

In Part 1, I introduced my new sink and gave some background on it. Now, I want to talk about getting the bathroom ready for the install.
I spent approximately 8 billion hours researching online for how to install the sink. Here are the main concerns I had and what I learned:
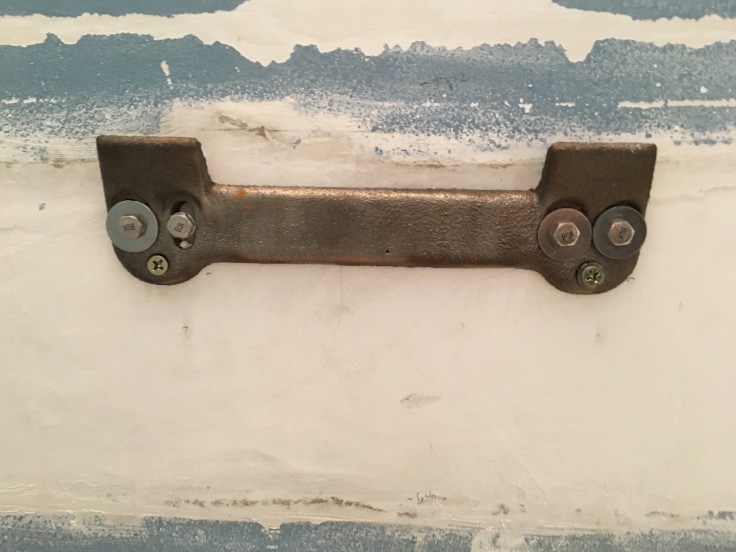
- I was worried about supporting the sink, since it’s wall mounted and we don’t have legs for it (and probably won’t get any to keep the space feeling more open). I learned that you need to cut out the wall and install a backing board if there isn’t one already and if there aren’t studs where you’ll be installing the sink. Of course, the walls are plaster and lath, not drywall like every. single. example installation online. I FINALLY found a 30 year old article in Old House Journal that briefly mentioned cutting the plaster and lath back to be even with the stud. Seems obvious, but I wasn’t sure. I also had to do a lot of research on how to patch the plaster. I bought an old cast iron mounting bracket off eBay (also saw some nice looking ones on the Signature Hardware site).
- I was worried about how to lay out the pipes under the sink. The drain comes out of the wall on the side of the vanity, and the supply lines come out of the floor. It was set up like this under the vanity:
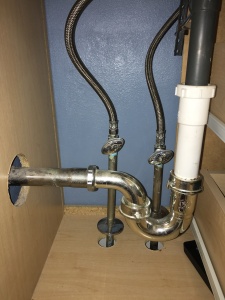
The cold water supply actually comes up through the floor a few inches to the right of where it comes into the vanity. They installed an elbow on it, I assume to clear the drawers.
I ran through a bunch of different possible layouts. I decided not to mess with the supply lines because they come up through the tile, and I don’t want to mess up the tile. I thought about trying to move the drain around the corner to come out of the back wall, but that’s beyond my skill set (who are we kidding, when I started this project, it was all beyond my skill set). I thought about running the pipe along the side wall to the back wall and then having it come up and over to the drain to put it further out of the way, like this. I also thought about doing the same thing, but moving the drain closer to the back wall so the arm coming out of the drain doesn’t have to be as long.
I still like that option, but I decided that for now, I’ll just use a longer arm so I can rotate the trap toward the back a little to be even with the drain, which is 2″ closer to the back wall than the drain on the vanity. Then I’ll stare at it a bunch and decide if I want to change it. Baby steps.
Removing the old vanity
I made sure the water was off. Very important. Ask me how I know! I turned off water to the whole house just to be sure, and because the hot shutoff valve leaked a little bit.
I read online that you should use a utility knife to “score” the caulk between the back of the sink and the wall. Scoring got me nowhere. I had to dig into it with a putty knife. Took off some paint and a couple chunks of wall in the process. I also had to work the putty knife between the counter and the vanity on the right side because it was caulked there, too. The left side was against the wall and inaccessible.
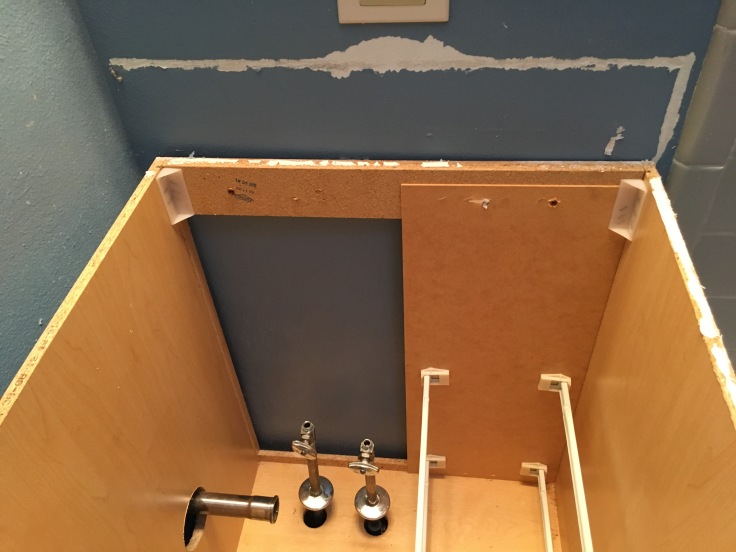
I unhooked all of the plumbing, lifted off the counter/sink, and unscrewed the vanity from the wall. My original plan was to remove the drain pipe coming out of the wall and lift the vanity over the supply lines. I couldn’t get the drain pipe out, though, so I ended up pulling the vanity apart. So many staples…
It took about 30 minutes of intermittently messing with the caulk over the course of a couple days, plus another hour and a half to unhook everything and remove the counter and vanity. I also replaced the shutoff valves with new quarter turn valves, which took just over an hour because I’d never actually used Teflon tape before, and my first try leaked. The first time, I wrapped the tape counterclockwise, so I think it loosened as I screwed on the valve clockwise. From what I’ve read, the quarter turn valves are preferable to the older style ones I had. I think they’re quicker to shut off and less likely to leak.
Step 3: Figure out where everything would go
I hooked as much as possible up to the sink to get an idea of how it would all fit together. Drain (nabbed from the vanity sink), drain extension, trap, drain pipe, and supply lines.
I marked where it would go on the wall and used that marking to mark where the mounting bracket would go by measuring the distance between the top of the sink and the lip where the top of the mounting bracket would sit. I measured and noted these distances since I’d be cutting out the marks to install the backing. The holes for the mounting bracket were 3″ below the top of the sink, so I figured that placing the bracket in the middle of the 6″ wide board would work well to support the sink because the top of the sink would be at the top of the backing board. I planned to place the top of the bowl at 31″ to accommodate the legs I’m planning to add at some point.
Step 4: Procrastinate for several days
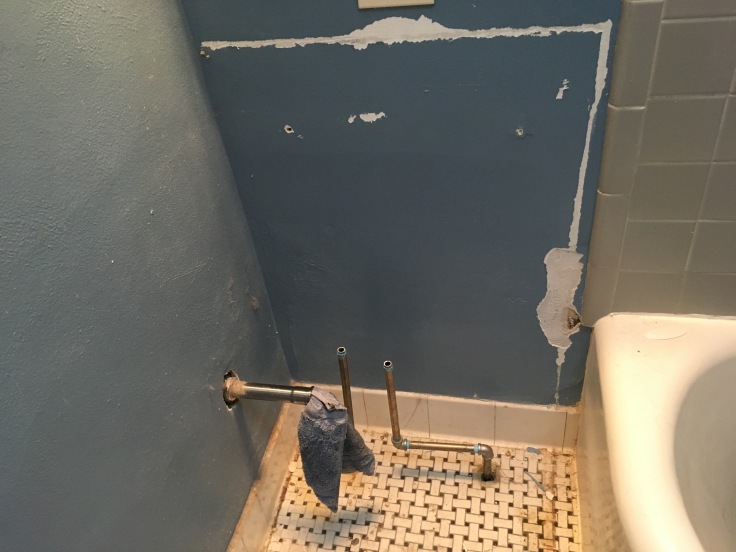
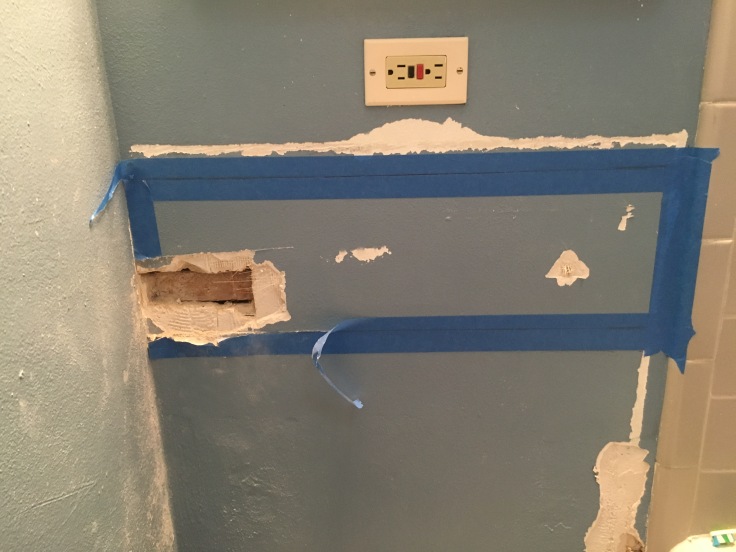
Step 5: Prep wall for sink
I didn’t even bother trying a stud finder because a) I don’t have one and b) I figured the lath would make it unreliable. I assumed that the corner of the wall had a stud, so I started there.
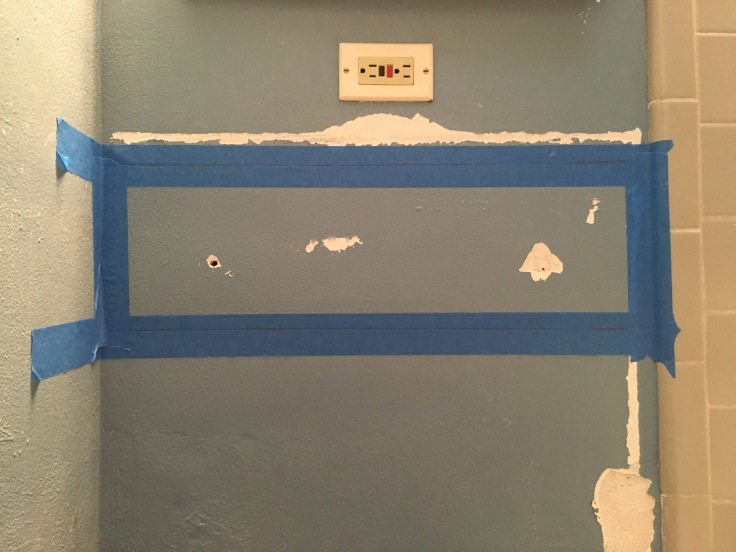
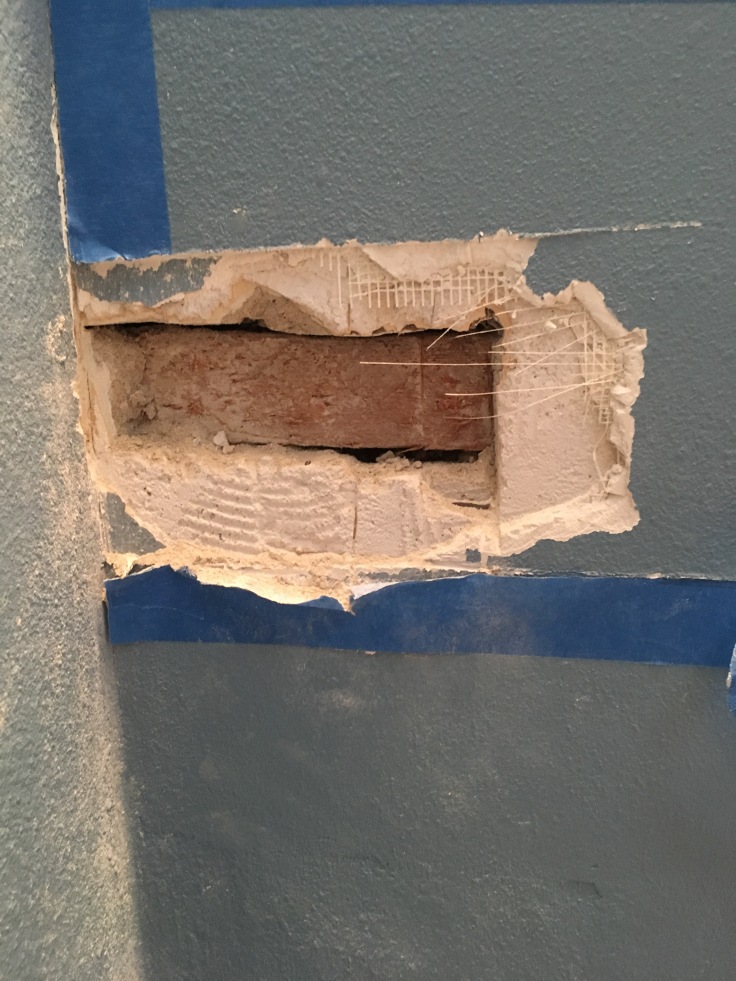
My approach to cutting the wall was cobbled together from a bunch of sources. I taped the area I wanted to cut with painter’s tape to avoid breaking off too much plaster and used a level to draw the line I wanted to cut on the tape. I aimed for slightly larger (about 1″ top and bottom) than the 2×6 I was going to install. Then, I used a utility knife to repeatedly score the plaster. Once I’d made some progress through the plaster, I started using a flathead screwdriver to pry out pieces of plaster. Then I alternated between this saw to cut and a screwdriver to pry chunks out. Sticking the saw between the lath and sawing horizontally seemed to be the most efficient way to approach it. I ended up positioning the hole a little lower than I’d planned to line up with the gaps between the lath.
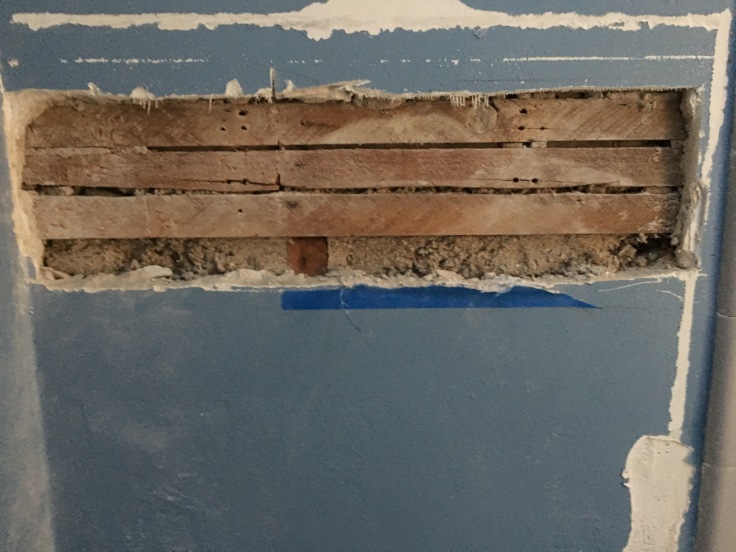
While removing the lath, I discovered another board running horizontally underneath it. Based on the holes in it, my guess is that it’s a backing board for a former sink. If I’d known about it, I could’ve avoided messing with the wall at all. Nice.
The bottom edge of the board is actually where I’d planned to put the screws for the mounting bracket. After some consideration, I decided to move the sink up a couple inches to place the mounting screws on that board. That means it might be harder to get legs that are the right height, but I think it’ll be fine without them, especially in this small space. Getting everything removed took about 2.5 hours.

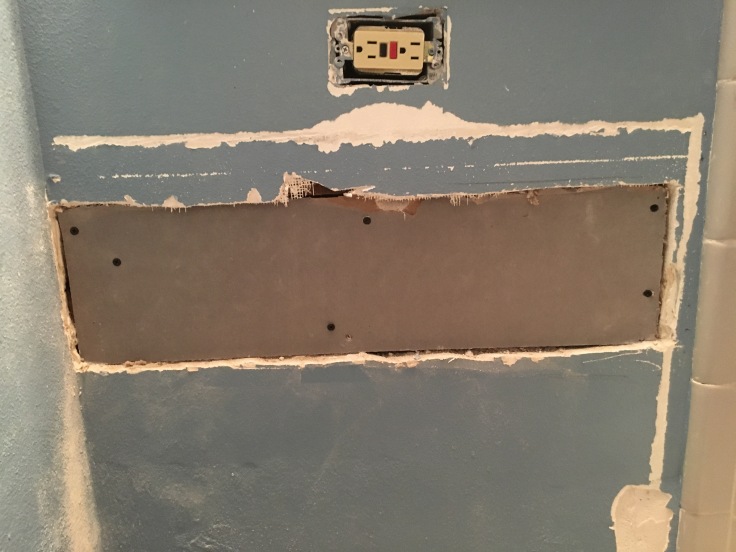
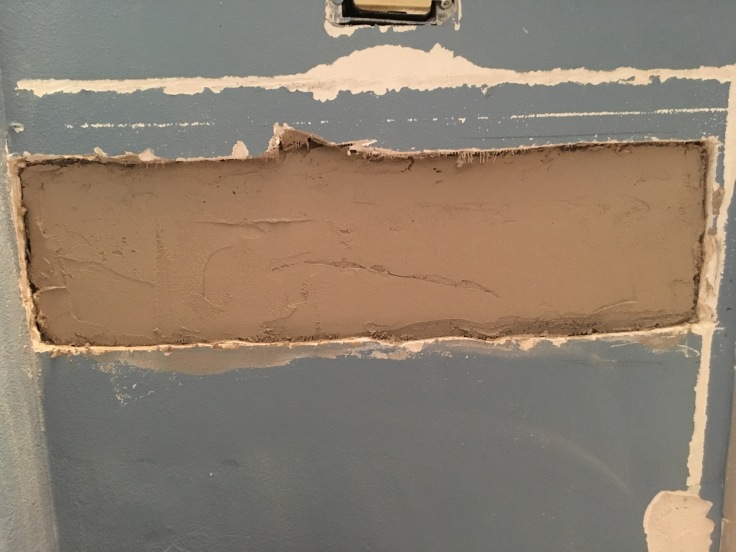
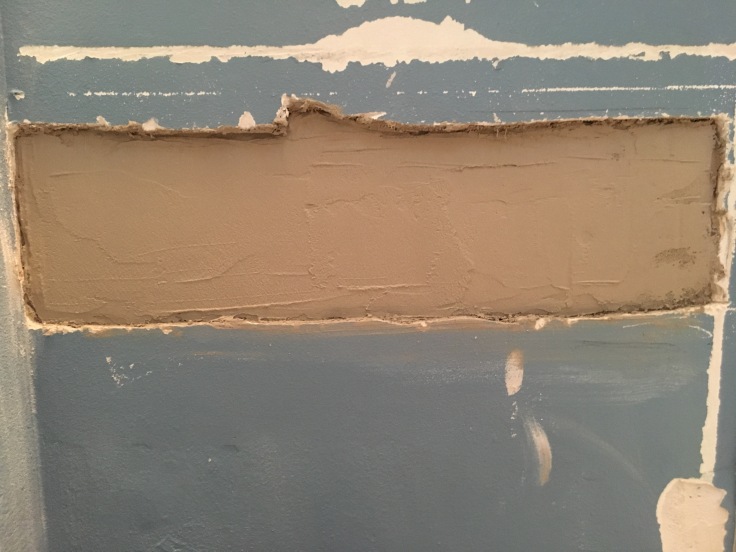
The gap between the backing board and the front of the wall is just over 1 1/4″. I had 1/2″ blueboard (drywall with a paper coating that avoids interfering with the plaster curing properly by not absorbing too much moisture from it). and planned to put on 1/4″ of plaster, so that left another 1/2″ to build out. I thought about using furring strips like what had been there before, or another piece of blueboard, but I was worried about building it out too far. I decided to use Structo-lite plaster base, followed by the veneer plaster I’d already bought. This ended up working well because I realized that I hadn’t bought the veneer plaster base, and I couldn’t find it in stores anywhere.
To patch the wall, I screwed a piece of blueboard to the backing. I’d bought drywall tape designed for plaster veneer, but I forgot to use it. I hope that doesn’t come back to bite me. Then, I mixed a small batch of Structo-lite, aiming for a yogurt or runny peanut butter consistency, and applied a coat using a trowel (my first time ever!). After a couple hours, I mixed up another batch and applied another coat. Finally, after a couple more hours, I mixed up a batch of the veneer plaster and made it look as nice as I could. Each coat took about half an hour to mix, apply, and clean up after. I covered the floor under where i was working, but I also managed to fling plaster on the walls in a few places. It cleaned up easily with a wet sponge.
Step 6: Install sink!
Once the plaster had cured, which took 24 hours, I re-measured for the sink and mounting bracket, then installed the mounting bracket using bolts, making sure it was level.
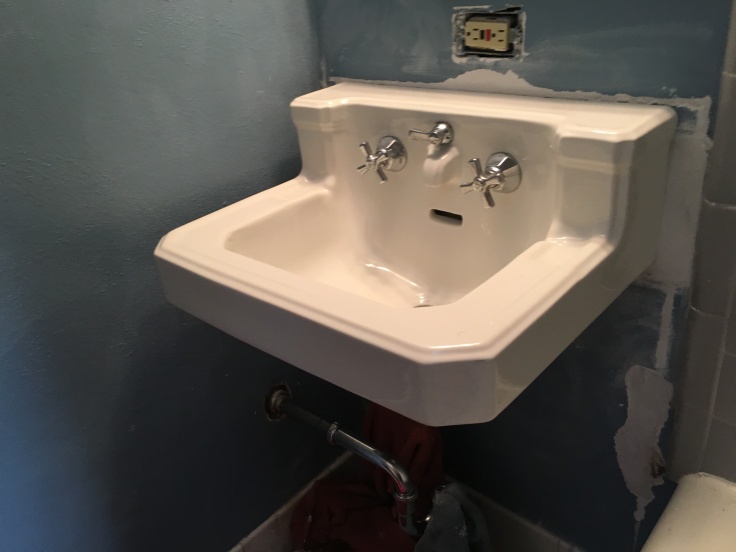
I had a lot of trouble getting the supply lines connected. I used 3/8″ O.D. chrome-plated supply lines like these. The nosepiece wouldn’t fit in the nut that held the supply line to the sink, so I had to cut it off with a little pipe cutter. But when I tried without it, the water pressure blew off the line. Finally, I figured out that I needed to add an o-ring. Everything seemed to hold together well after that, as has since. The other challenge was bending the lines so they would be exactly vertical where they enter the valve and the sink. Otherwise, they’ll leak.
Once everything was finally together, I found that the faucets also leaked. Again, new o-rings seemed to help. They still link, so I’m going to need to replace the stems with some I found at DEA Bath. I also have an original drain I got on ebay on its way to replace the new one I had to use.

Hooray!
All in, the project should’ve cost maybe $300? A little if you count the things I bought and couldn’t return because I ruined them (e.g., multiple supply lines). Almost half of that was the new old drain. I also got a few tools that I’ll use again.
Here are some resources I found useful:
Family Handyman re: wall-hung sink installation

Leave a comment